As an example, imagine you have twenty acres of Bahia pasture that you are using to graze horses. Ten acres are high and dry with very deep sand and the remaining ten acres are more low lying with higher organic matter soil. You would want to consider these two ten acres as separate sampling areas because they have different soil types and different elevations. You might label one as “high” and the other as “low”.
Pulling and Preparing Samples
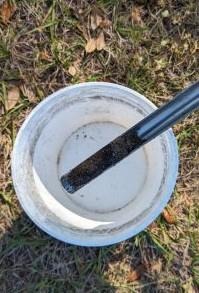
Once you have your sampling plan you can start pulling your soil samples. You’ll want to randomly walk through your sampling area, stopping in approximately 20 locations to pull samples. Make sure that the spot you are pulling a sample from is truly representative of the entire area and not an outlier (avoid areas with manure, urine, ant hills etc.). Pull soil from the surface to 4 inches of depth using a soil probe or hand trowel and put the soil in a clean plastic bucket. Once you have pulled from at least 20 spots, mix the soil in your bucket and check to see if it is dry. If the soil is moist, you can spread it out on clean paper to air dry, otherwise you can go ahead and prepare you sample by removing a pint of soil from the bucket and placing it in a small brown paper bag (official soil sampling bags are available for free at your local county Extension office). Make sure the bag is labeled with the name of the sampling area, your name, and the name of the crop you are growing and that your labels all match what is used on the submission form.

Insert your soil probe, or hand trowel, into the soil removing a column of soil from 0-4 inches of depth. Place the soil in a clean plastic bucket and repeat this process approximately 20 times within the same sampling area in order to obtain a representative sample of soil from your pasture.
Source : ufl.edu