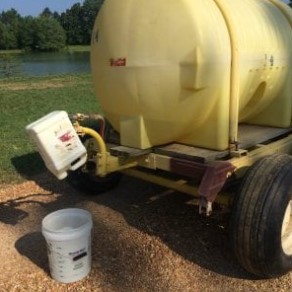
Figure 1. Basic equipment needed for proper sprayer calibration.

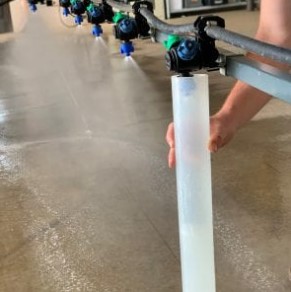
Figure 2. Calibrating a boom sprayer requires catching output from individual nozzles in fluid ounces for the calculated time.

Figure 3. Using a clean container fitted over a boomless nozzle works well as a funnel to determine sprayer output.
Boom Sprayer Calibration
Among the many ways to calibrate a sprayer, the simplest is the 1/128 acre method, also called the baby bottle method. This method scales down the calibration course to 1/128 acre (340 feet2) because there are 128 fluid ounces in a gallon. This means that the spray collected from a single nozzle in fluid ounces directly correlates to gallons per acre (GPA) regardless of the number of nozzles on the boom.
- Fill the sprayer with clean water
- Measure nozzle spacing in inches, and then convert to feet by dividing by 12.
- Refer to the following chart to determine calibration course.
- Measure and stake off the appropriate calibration course based on nozzle spacing.
- The course should be on the same type of ground as that to be sprayed. (Speeds may be faster on roads than on sod, changing the application rate).
- Drive the course in the speed, gear, and rpm you will use when actually spraying. Record the time in seconds. Do this twice to get an average.
- Park the tractor or vehicle and maintain the same rpm.
- Turn on the sprayer, and catch the water from one nozzle for exactly the same time that it took to drive the calibration course (figure 2).
- Ounces caught = gallons per acre.
Boom Sprayer Calibration
1 To determine the calibration course for a nozzle spacing not listed, first convert the distance between two nozzles from inches to feet. Then divide 340 by the nozzle spacing in feet (1/128 of an acre is 340’). Example: Calibration distance for 19” nozzle spacing = 340 divided by 19/12 = 215 feet.
Boomless Sprayer Calibration
As with calculating the boom sprayer, you will need to scale down to a fraction of an acre; in this case, 1/8 of an acre (5,445 feet2) as output will be measured in pints. The sprayer output collected from the boomless nozzle measured in pints will directly correlate to gallons per acre (GPA).
- Fill the sprayer with clean water.
- Turn the sprayer on and measure the effective swath width in feet. Spray patterns are most visible on dry soil, concrete, or gravel.
- Refer to the following chart to determine calibration course:
- Drive the course in the speed, gear, and rpm you will use when actually spraying. Record the time in seconds. Do this twice and get an average.
- Park the tractor or vehicle and maintain the same rpm.
- Turn on the sprayer, and use a trash bag or other improvised funnel and bucket to catch the water for exactly the same number of seconds required to drive the calibration course (figure 3).
- Pints caught = gallons per acre (GPA).
Boomless Sprayer Calibration
1 To determine the length of the calibration course for a swath not listed, divide 5,445 feet2 (1/8 acre) by the swath width in feet. Example: Calibration distance for 26’ swath width = 5,445 divided by 26 = 209 feet.
Points to Remember
- If your equipment does not have a pressure gauge, you can affect output (GPA) by changing speed, raising or lowering nozzle above target, or changing nozzles
- If you’re changing GPA by adjusting the pressure gauge (PSI), you must increase or decrease PSI 4x in order to double or half, respectively, GPA
- To double the output (GPA), speed (MPH) should be decreased by 50 percent.
Helpful Conversions:
- 1 acre = 43,560 feet2
- 1 gallon = 128 fluid ounces = 8 pints = 4 quarts
- 1 mph = 88 feet/sec
Source : aces.edu