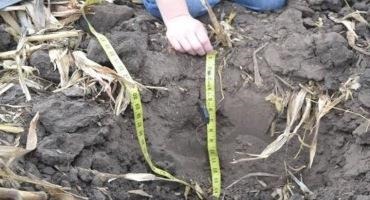
Figure 1. Digging a small hole with a spade is the best way to learn about the soil’s natural and unnatural layers, such as compacted layers. Use a knife to feel for any unusually dense layers, and a tape measure to determine the depth of the layer. Photo by of DeAnn Presley, K-State Research and Extension.
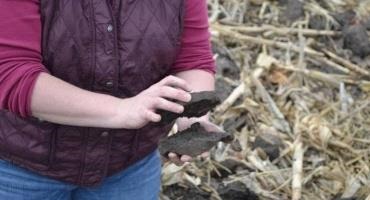
Figure 2. Large pieces of soil that are horizontally oriented, or “platy,” are a sign of compaction. Photo by DeAnn Presley, K-State Research and Extension.
Once you determine the depth at which the compaction occurs, you can work on solutions for improving (decreasing) the density of the compacted layer, or the soil in general. If compaction seems limited to the upper 3 inches of the soil profile, then the most likely culprit is traffic. Limiting traffic as much as possible when the soil is wet is a good practice for reducing soil compaction (Figure 3). Running properly inflated tires, using floatation tires, and having more tires in general helps to decrease surface compaction.
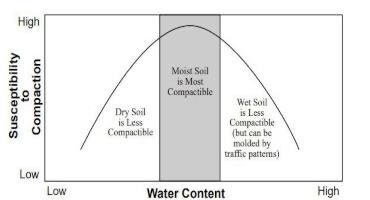
Figure 3. The amount of soil water is a critical factor in soil compaction potential. Moist soil is the most compactible. Graphic from K-State Research and Extension publication AF115.
A tougher problem to solve is subsurface compaction. If you can feel a layer that is compacted at depths greater than 6 inches, you may be dealing with subsurface compaction. Subsurface compaction should not be confused with a change in the soil texture. It is common to observe changes in the soil texture as you go deeper in the soil profile. Many soils have an increase in clay content in the upper part of the subsoil, which is natural and took a very long time to form. Some soils, such as those in floodplains, might have sandy layers present beneath the surface. This is the reason why the spade/post hole method is really the best, because it allows a person to discover so much more about the soil profile than using a tile probe alone.
Source : ksu.edu